In QuickerNotes, a Property represents a Mindbody Site or location connected to your account. Adding a property allows you to sync appointments, staff, and forms for that specific site.
Permission Required
To add or manage properties, you must have:
property:manage
If this permission is disabled:
The Property tab will not appear under Settings.
You will not be able to add, edit, or verify properties.
Contact your administrator if you need access.
Step 1: Open the Properties Page
- In the left navigation menu, go to Settings → Properties.
- You must have the following permissions to view and add properties:
- properties: view-all or properties: view-own
- properties: create
Note: If you don’t see the Properties tab under Settings, check your user permissions or contact an admin.
Step 2: Add a New Property
- Click Add Mindbody Site.
- Enter the Property Name and the Mindbody Site ID.
- Click Save to add the new property.
Step 3: Verify Ownership
After saving the property, you’ll need to verify ownership or access to the Mindbody site.
- Click Verify Ownership at the top-right of the property you just added.
- On the verification page, click Integrate with QuickerNotes.
Important: You must be logged into Mindbody as the site owner. If you aren’t, Mindbody will not allow API access.
Once connected, you’ll see that QuickerNotes has been granted API access for the site.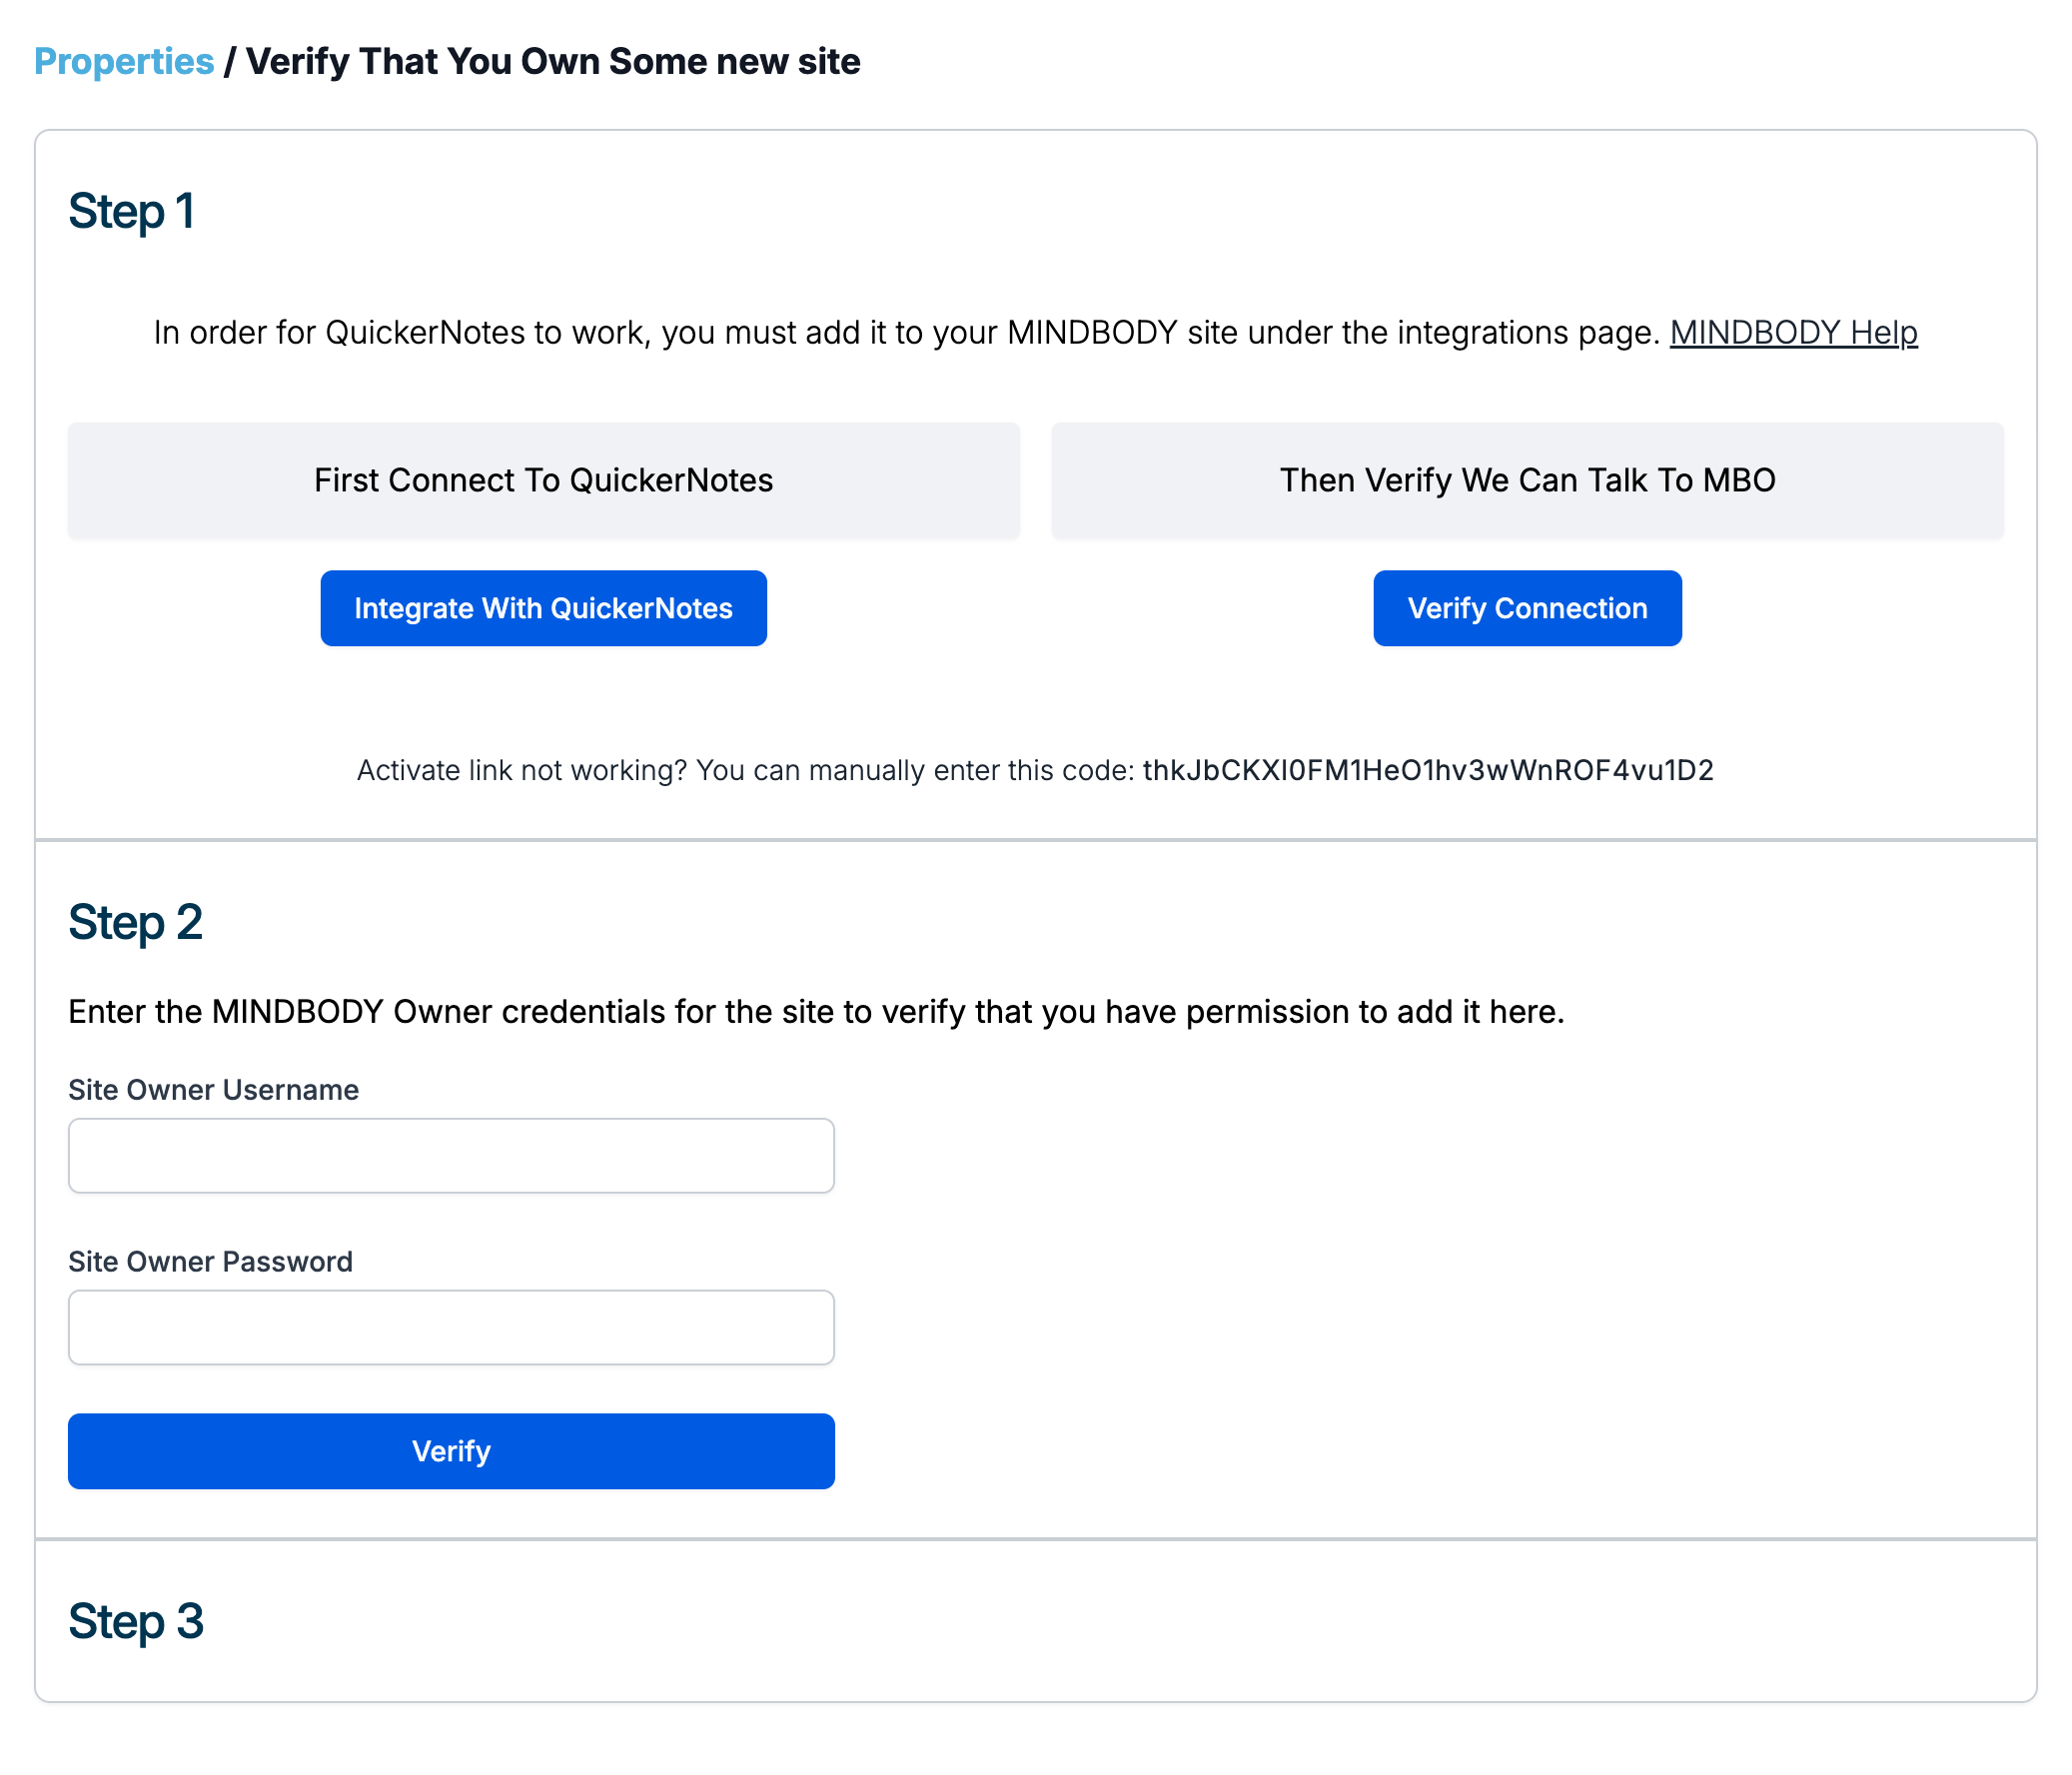
Step 4: Complete API Verification
- In Step 2 of the setup, enter your Mindbody owner username and password.
- You’ll receive a verification code by email.
- Enter the code in Step 3 to finish the setup.
What Happens Next
Once verification is complete:
Appointments begin syncing
Staff data is imported
Forms are available for that property
You can then activate a subscription for the property if needed.
Was this article helpful?
That’s Great!
Thank you for your feedback
Sorry! We couldn't be helpful
Thank you for your feedback
Feedback sent
We appreciate your effort and will try to fix the article