Intake Form Templates allow you to build the forms clients complete before their appointments. From here you can create forms, add custom questions, add policies, reorder sections, configure send rules, and set expiration rules.
Permissions
To manage intake form templates, your role must include the appropriate Intake Form permissions in:
Settings → Roles & Permissions → Forms
forms:create-templates
forms:delete-templates
(others as needed for your account)
If you don’t see the Intake Form Templates page, your role likely needs updating.
Create a New Intake Form Template
Go to Settings → Intake Form Templates.
Click New Form Template.
Enter the form name and start adding questions or policies.
Click Save in the lower-right corner when finished.
Edit an Existing Intake Form
Go to Settings → Intake Form Templates.
Under the template list, click Edit next to the form you want to update.
Make your changes.
Click Save in the lower-right corner.

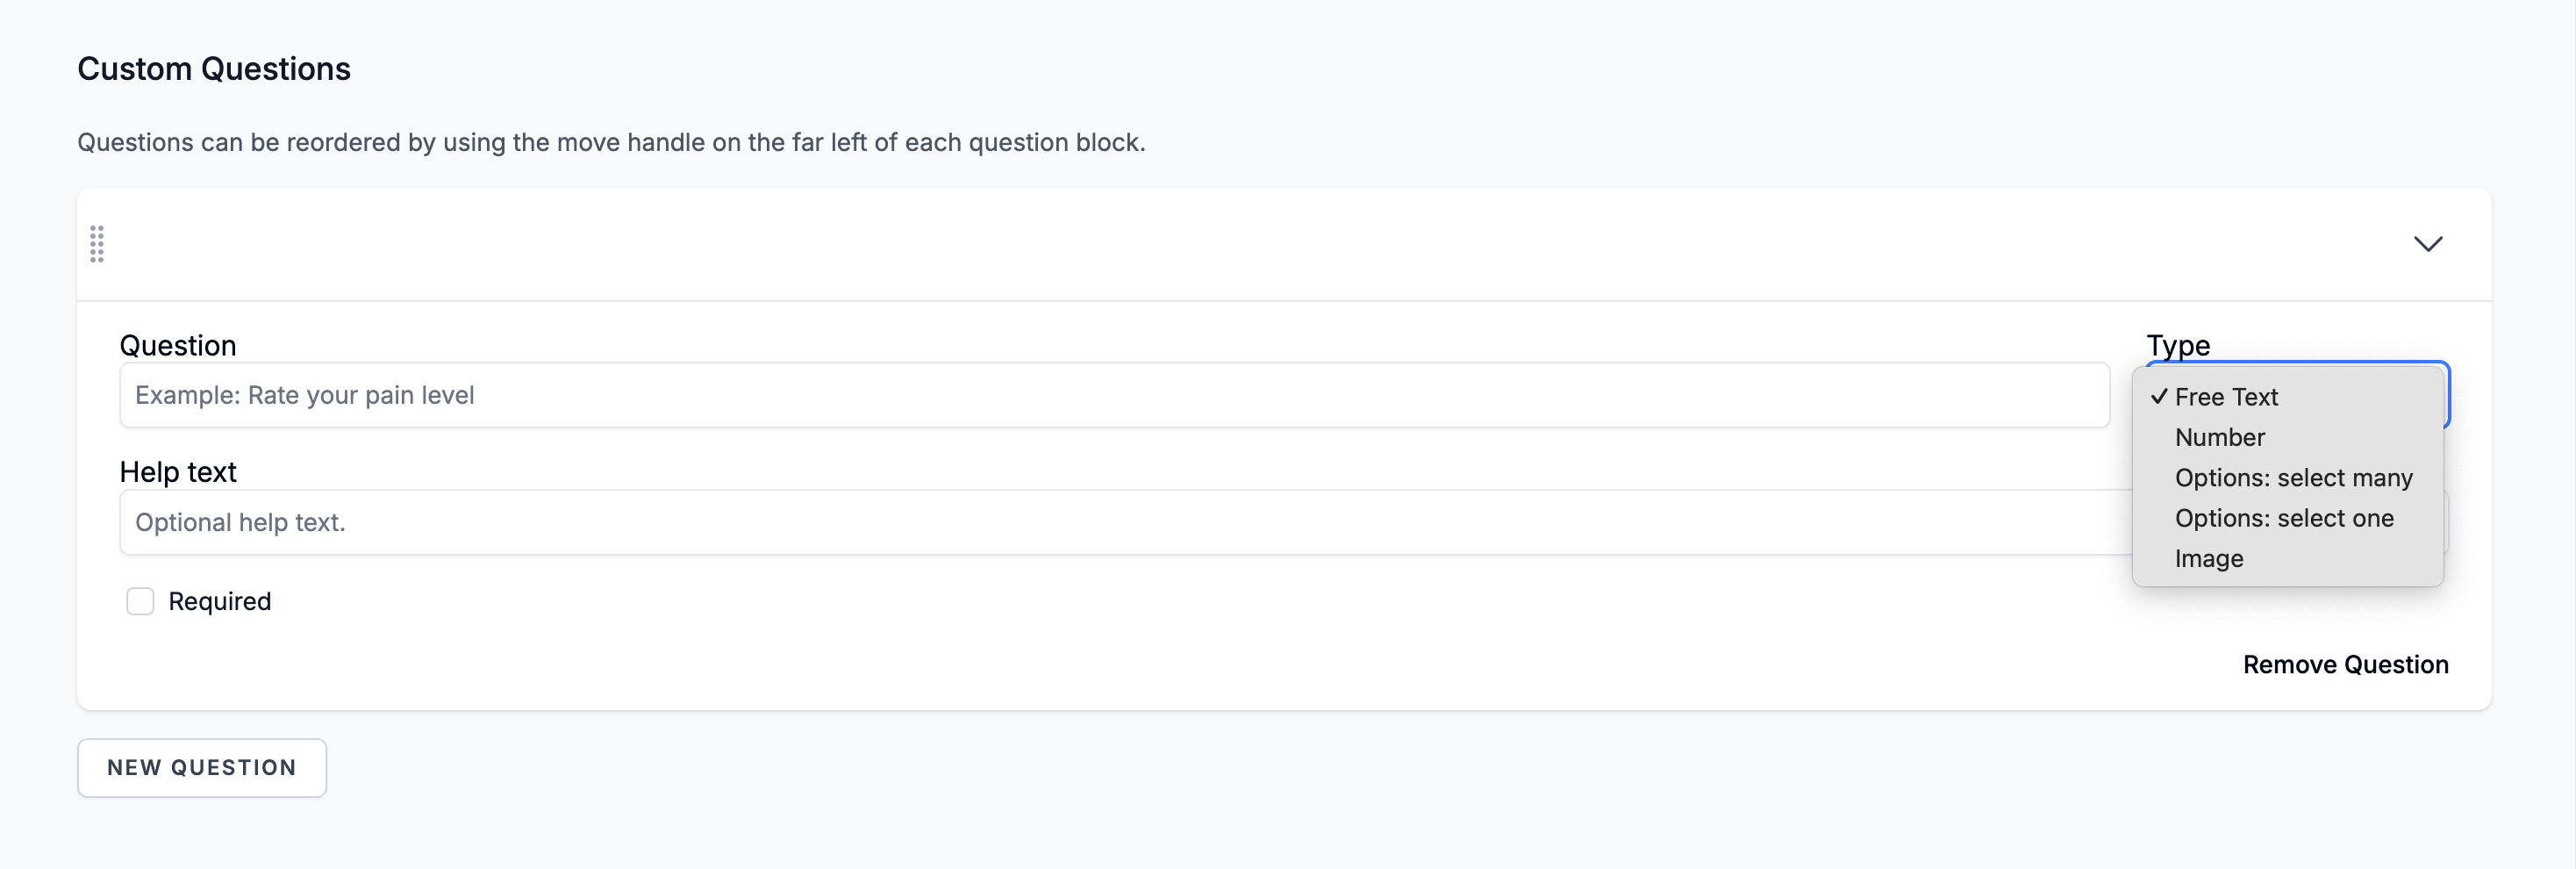
Custom Questions
You can add custom questions to collect client information relevant to your clinic.
Question Types
Free Text
Number
Options — Select One
Options — Select Many (Select Many cannot be required)
Add a Question
Scroll to Custom Questions.
Click New Question.
Enter your question text, help text, choose the type, and toggle “Required” if needed.
Click Save.
Remove a Question
Click the arrow next to the question.
Choose Remove Question.
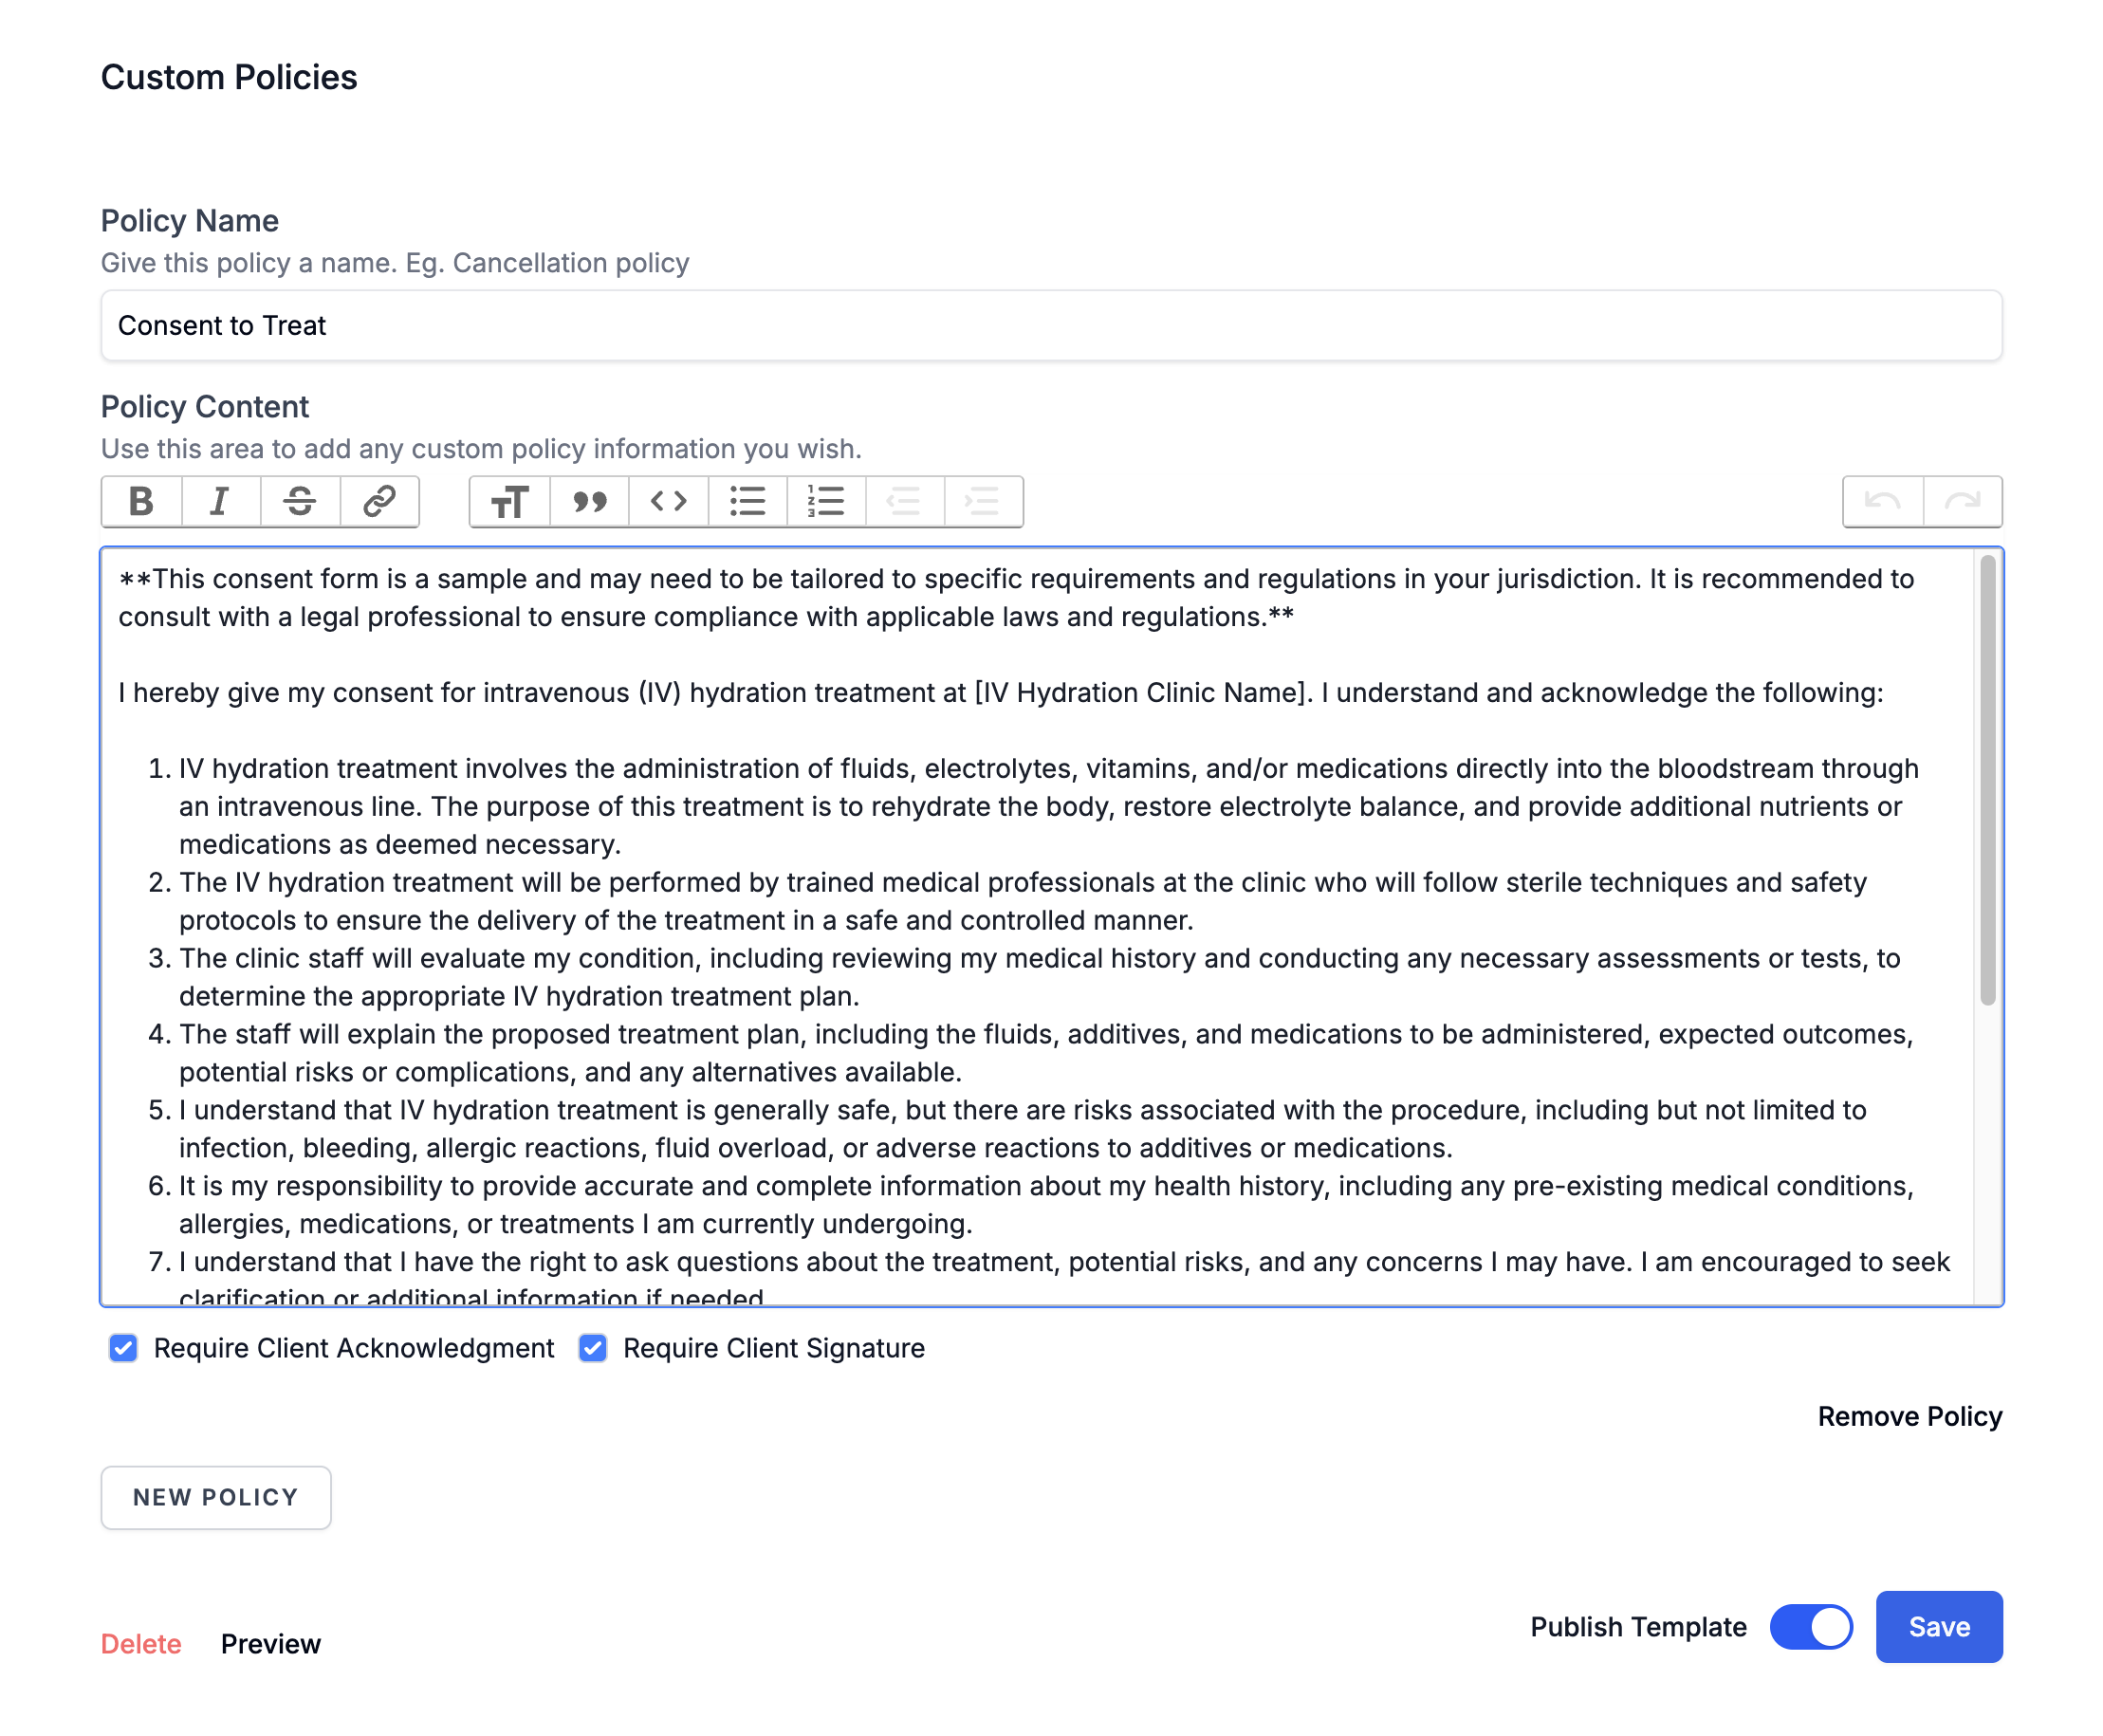
Custom Policies
Policies allow you to show important information and optionally require acknowledgement or signature before the client submits the form.
Add a Policy
Scroll to Custom Policies.
Click New Policy.
Enter the policy title and content (HTML links supported).
Choose whether the client must acknowledge or sign.
Save the form.
Translate Intake Forms
You can add translations for any custom question or policy.
Open the form template.
Click Translate Form in the upper-right corner.
Choose a language from the dropdown.
Enter translations for each field.
Click Save.
For full instructions, see Translating Intake Forms (Languages & Localization).
Send Rules (Automatic Sending)
Send Rules control when a form is automatically generated and emailed to the client.
You can choose to send a form when:
1. First-Time Booking by a New Client
Sends the form the first time a new client books selected services.
2. First-Time Booking by Any Client
Sends the form the first time any client books selected services.
3. Every Time the Service is Booked
Sends the form every time the selected service(s) are booked.
4. Don’t Send With
Blocks this form from sending if other specified forms are also assigned for sending.
5. When to Send
Determines the timing of the email (ex: immediately at booking).
6. Email Client When Form is Created
This toggle confirms whether the form email should be sent to the client when the form is generated by the send rule.
If off, the form will still be generated—but no email will be sent automatically.
This is commonly disabled when forms are completed only via kiosk check-in.
7. Upload to Mindbody
Toggle ON to automatically upload completed forms to the client’s Mindbody profile.
Expiration Rules
You can set a form to re-send after a certain number of days.
How Expiration Works
When a client books one of the selected services:
If the client has not submitted the form within the expiration window
A fresh version of the form will auto-send
The client must complete it again
How to Set Expiration
In the form template, configure Send Rules → First-Time Booking
Once a service is selected, the Does this form expire? setting appears.
Enter the number of days before the form expires.
Save your form.
For full details, see Intake Form Expiration Settings.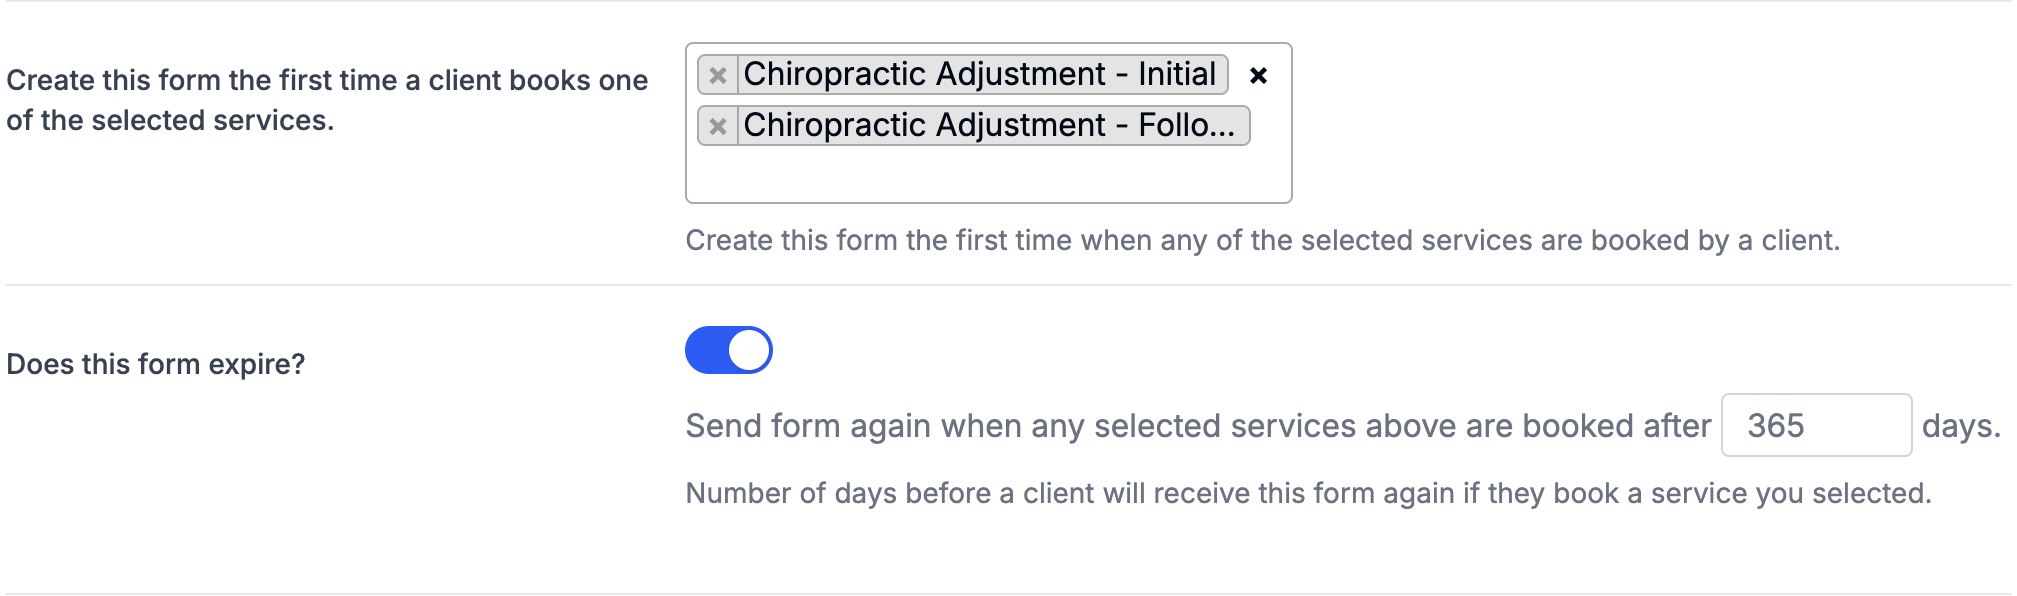
Other Intake Form Features
These features are part of intake workflow but are documented separately:
Was this article helpful?
That’s Great!
Thank you for your feedback
Sorry! We couldn't be helpful
Thank you for your feedback
Feedback sent
We appreciate your effort and will try to fix the article